Picmim teams help you keep social content moving without losing control. Invite collaborators, decide who can approve posts, use comments for feedback, and review Plan suggestions together before content is scheduled.
Inviting Team Members
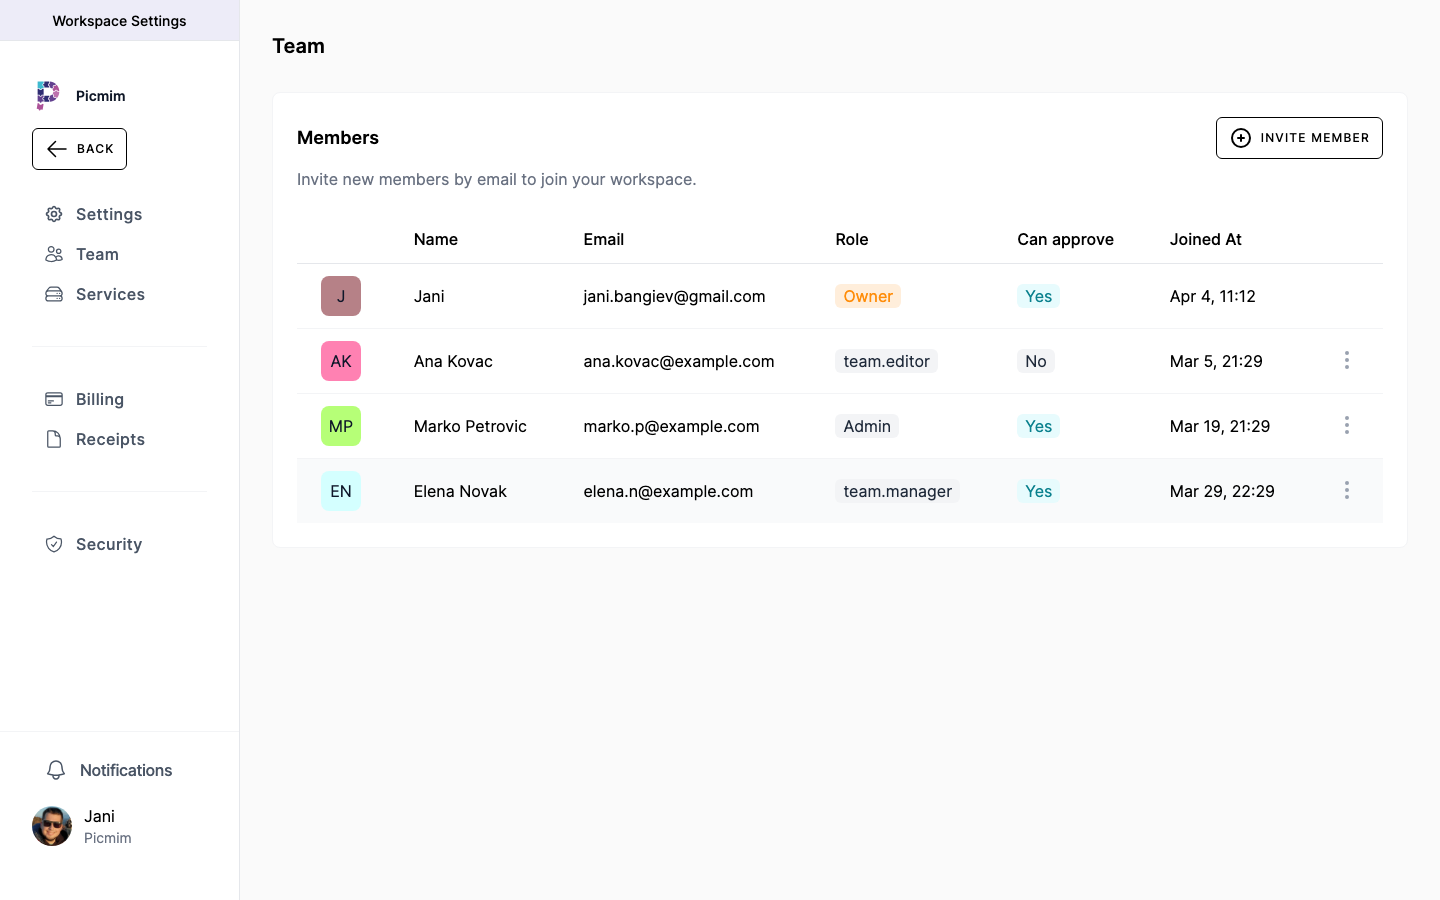
Invite people by email when they need access to your workspace. Their role decides whether they can manage settings, create content, approve posts, or only review work.
- Open Settings and select Team Members.
- Choose Invite Member and enter the person's email address.
- Assign the role or permission set that matches their responsibility.
- Send the invitation. The recipient can join after accepting the email invite.
- Review pending invitations from the team list.
Tip: Invite approvers before you start a team review flow so content is not blocked waiting for the right person.
Roles and Approval Rights
Roles control access to workspace areas, while approval rights decide who can approve or reject content. Keep approval rights limited to people who are responsible for brand, compliance, or publishing quality.
- Admins can manage workspace settings, billing, team members, accounts, and content.
- Members can create and edit content, use Pim, manage media, and work on Plans according to workspace permissions.
- Viewers can review visible content and analytics without creating or publishing content.
- Anyone with approval rights, including clients invited as Viewers, can approve or reject posts and team review items.
- Change roles or approval rights from Team Members when responsibilities change.
Warning: Keep at least one Admin in every workspace so billing, accounts, and team access can always be managed.
Approvals and Swipe Review
Approval workflows help teams decide what is ready to publish. Plan suggestions can be reviewed with keep or decline decisions, while posts can move through draft, submitted, approved, scheduled, published, or failed states.
- Create a Plan or manual post as usual.
- Use swipe review to keep useful Plan suggestions and decline the ones that do not fit.
- Submit posts for review when your workspace requires approval.
- Approvers review caption, media, accounts, schedule, and comments before approving.
- Approved content can be scheduled or published according to the workflow.
- Rejected or declined content can be revised, replaced, or left out of the final schedule.
Tip: A declined Plan suggestion is not scheduled. An approved scheduled post can still be edited before it publishes if your permissions allow it.
Comments and Feedback
Use comments to keep feedback attached to the post, Plan suggestion, or asset being discussed. This avoids losing approval decisions in external chats.
- Open the post or item that needs feedback.
- Leave a clear comment with the requested change or decision.
- Reply in the thread when a discussion needs context.
- Mention teammates when they need to review or answer.
- Resolve the feedback by editing the content, approving it, or declining the suggestion.
Collaborating on Assets
Media notes help teams decide which photos, videos, or design exports are ready for use in posts and Plans.
- Open a file from the Media Library.
- Leave notes about edits, approvals, usage rights, or campaign fit.
- Reply to asset notes when a visual needs clarification.
- Replace media on a post or Plan suggestion after the asset is approved.
- Keep reusable assets organized so future Plans can use them faster.
Switching Between Workspaces
If you manage several brands, locations, or clients, each workspace keeps its own accounts, Plans, posts, media, analytics, billing, and team settings.
- Use the workspace selector to choose the workspace you want to manage.
- Confirm you are in the correct workspace before creating Plans or publishing content.
- Remember that connected accounts, Plan history, and notifications are workspace-specific.
- Invite collaborators separately to each workspace that needs shared access.
Removing Team Members
Remove access when someone no longer works on the brand, client, or workspace. Their historical comments and created content remain part of the workspace record.
- Open Settings and select Team Members.
- Find the member you want to remove.
- Use the member action menu to remove them from the workspace.
- Confirm the change.
- Review open approvals or assigned work so nothing important is left waiting.
Warning: Before removing an approver, make sure another teammate has permission to approve content.